Are you looking for ways to automate some of your manual processes, with the goal to move them from Excel into NetSuite? One common method is to configure Expense Allocation Schedules. If you would like to learn more about Expense Allocation Schedules, read here.
Your company may already be using Fixed Expense Allocations in NetSuite (read more here), and you may have even layered in statistical accounts and Dynamic Allocations (read more here). If so, you may be ready to combine your existing schedules into the last type of allocations in NetSuite: Allocation Batches. In part four of our series on Expense Allocation Schedules in NetSuite, we’re looking at Allocation Batches to see if they would be a right fit for your company, as well as explain how to create and run these batches.
What are Allocation Batches?
An Allocation Batch, also called step-down allocation in cost accounting, allows you to define the order in which allocation schedules run. Each batch can hold up to 10 schedules, and each schedule will result in a non-approved, non-posted journal. Journals will typically not have any impacts (G/L or otherwise), and cannot be included in other processes, until approved. Allocation Batches are the exception. A key benefit to the Allocation Batch is that these journals, even in their unapproved state, can be used as a source for the remaining allocation schedules included in the batch.
How to Create Allocation Batches
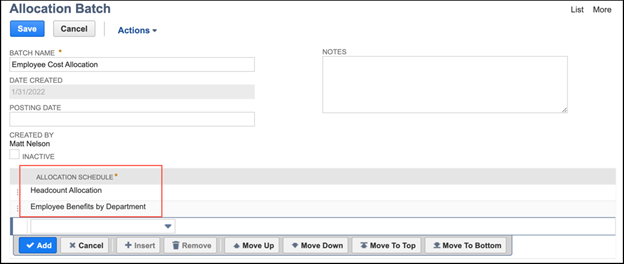
To create Allocation Batches in the Classic center, navigate to:
- Transactions > Financial > Create Allocation Batches
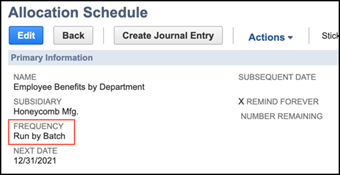
Note: Only allocation schedules with a frequency set to Run by Batch can be included, so update existing schedules before creating a new Allocation Batch.
As a reminder, you can run up to 10 schedules at a time, which may have a noticeable impact on productivity. Note that once an allocation schedule is included in a batch, you can’t inactivate, delete, or run that schedule independently without first removing it from the batch.
How to Run an Allocation Batch
To run an Allocation Batch from the Classic center, navigate to:
- Transactions > Financial > Create Allocation Batches > List
- Then click View next to the batch you’d like to run.
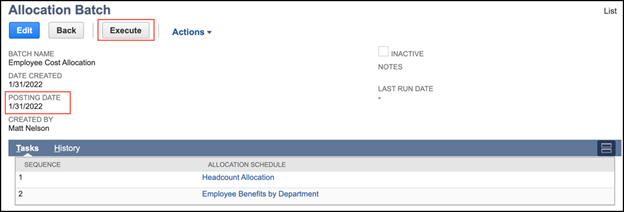
- Once the batch record is open, ensure the posting date for resulting journals is set.
- Then click Execute.
Note: You won’t be able to run the batch without including a Posting Date, even though it’s not a required field.
One of the biggest risks with using Allocation Batches is that they will only run successfully as long as every single schedule in the batch has at least $1 to allocate. If any of the included schedules don’t have a result for a given month, then the entire batch will fail.
Conclusion
Allocation Batches in NetSuite are a powerful way to run multiple allocation schedules at the same time, thereby reducing the amount of time spent running these processes. They also allow you to use the results of a prior allocation schedule as the basis for further allocations (as long as the interrelated journals come from the same batch). This adds flexibility and depth to your expense allocations in NetSuite.
Interested in learning more about Expense Allocation Schedules in NetSuite? Contact us at info@squareworks.com.


